Tuesday, November 6, 2012

Little Smokies Snacks

Once again it has been a while between my posts. This is going to happen from time to time as I seem to get distracted and move on to other things. Lately, I have been crocheting. I am trying to make a blanket for my wife and I to snuggle under, but...it seems to be a much larger task than I at first thought. I am looking for faster crochet stitches than a double stitch, lol. I think an afghan stitch paired with entrelac will go together much quicker and be nicer than just a single color blanket. We will see :)

On to the food! Today I have made us a tailgating snack for lunch. I found this recipe on Pinterest just like the rest of the recipes I have made. Here is the link to the full post about this recipe. What I liked about this recipe was how easy it was to make. What I didn't like was how long it took to bake.

Here is how I started:


I started by slicing a package of bacon into thirds...


Then I popped open a package of these Cocktail Smokies (the Morrell version of Little Smokies, just as good in my opinion) and poured them on my counter :D


I laid the bacon out like this and...


Yes, I know I used this pic earlier, but it shows how I rolled the Little Smokie into the bacon and stuck it on a bamboo skewer....


I put six of them on each skewer, then covered with brown sugar...liberally, lol. Pop in preheated 350 degree oven for about 30 minutes and...


An awesome, bacon wrapped, meat snack emerges ready to satisfy your bacon cravings! My kids loved these snacks as much as if not more than I did. And I LOVE BACON! This is definitely one that will be made numerous times...I may have to go make more now, haha :-D

Tuesday, September 25, 2012

Sweet Baby Ray's BBQ Chicken (Slow Cooker Style!)

Hey, Loyal Readers! Today I'm cooking with...BBQ sauce! Sweet Baby Ray's BBQ sauce, one of my favorites :) I'll be working from a recipe that I found here which I thought looked great, but I made a few changes to it...not many, but it's a little bit different :)

So, here is what I did to the recipe. The original recipe called for red pepper flakes, which I omitted. I added garlic salt w/parsley, and McCormick's Flavor Enhancer...better known as MSG, which I love :) I put all the dry ingredients in a bowl, then added the 1/4 cup vinegar and a full 40 ounce bottle of Sweet Baby Ray's BBQ sauce, and whisked it all together. The result was an even more delicious BBQ sauce than the Sweet Baby Ray's, though I would never have thought I'd say something like that :D

This one is sweet and simple. After thoroughly whisking all ingredients together I put my frozen, boneless, skinless chicken breasts (about 6 of them) in the slow cooker, poured the enhanced Sweet Baby Ray's over the chicken and set my cooker for low. Four to Six hours later we're going to have us some Sweet Baby Ray's BBQ chicken. Pictures and ingredients list to follow.

So, I couldn't find the camera soon enough to get pictures of the meal we had. Also, I didn't end up making the biscuits to go with them. I did try a cheese kinda thing that I found through Pinterest...here's the link. I didn't use the skim milk because I didn't have any :( I used buttermilk instead...not a great idea. The cheese melted out of the breading a bit. I would add a bit of spices to your bread crumbs as well. Even though they melted out a bit, and the lack of spices notwithstanding, the cheese balls turned out pretty good.

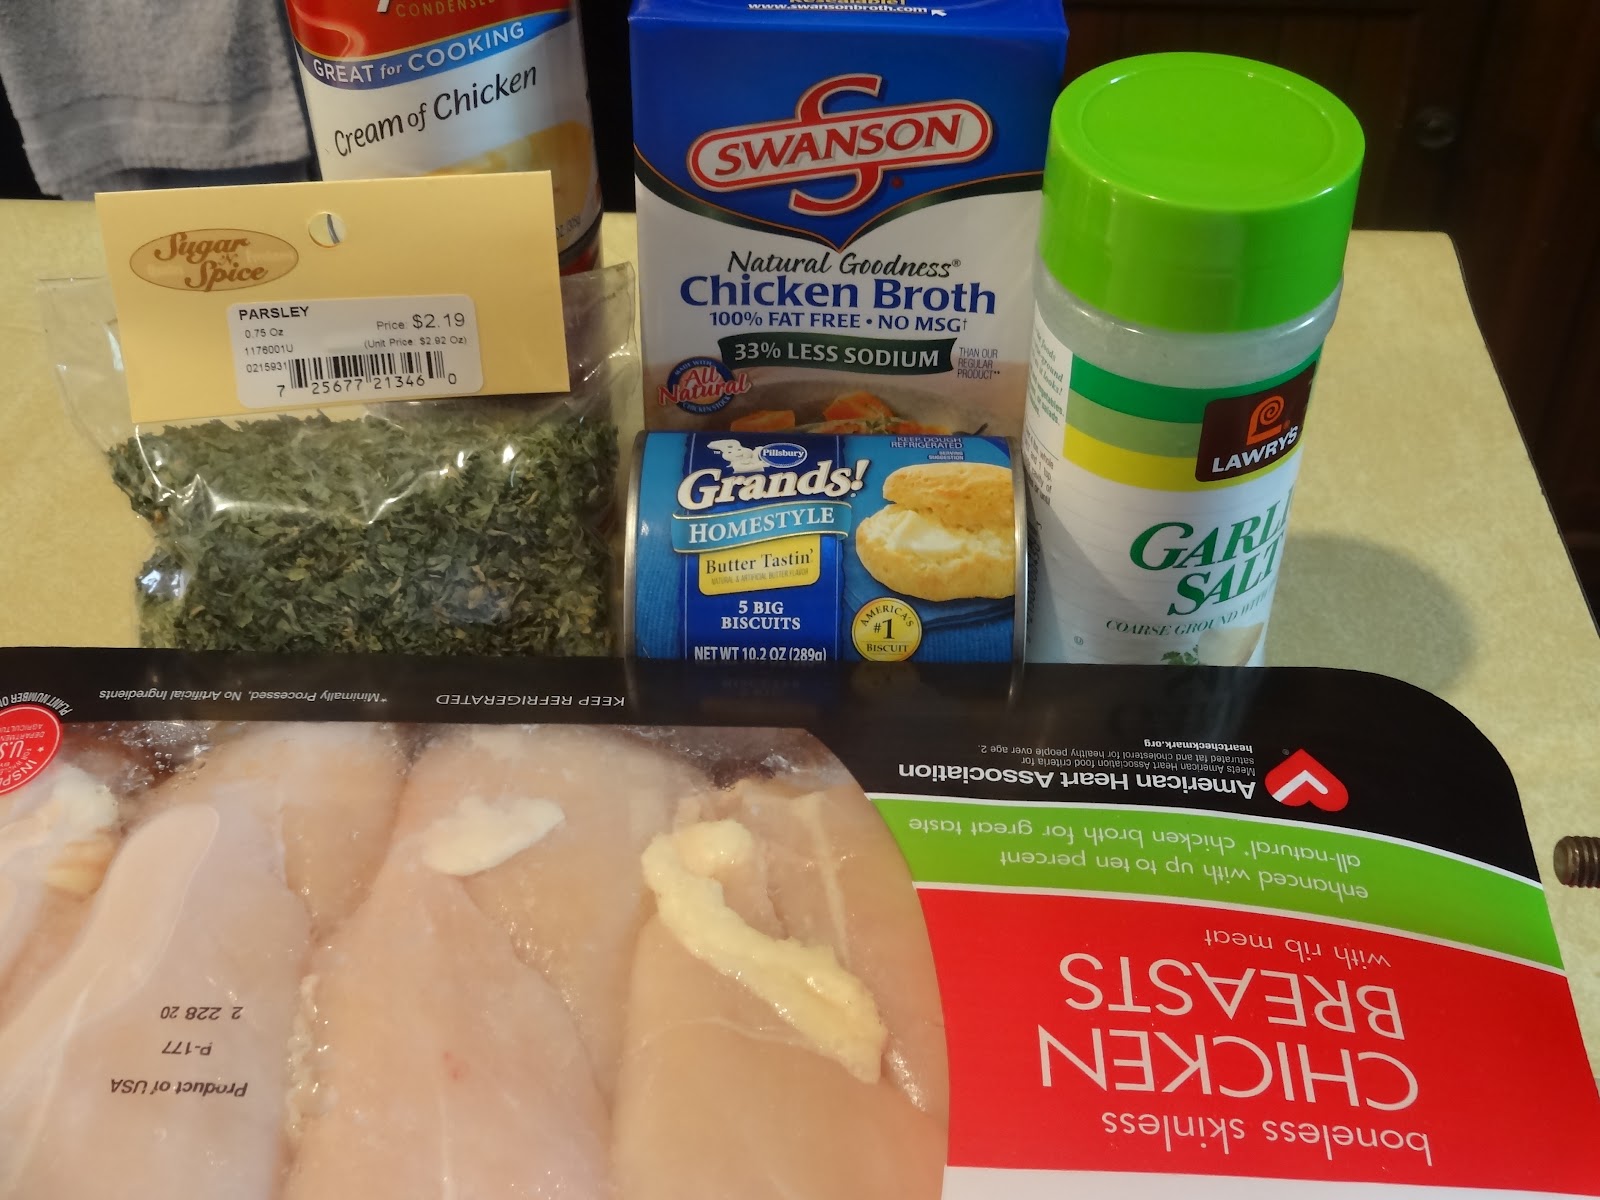
Ingredient list for Sweet Baby Ray's BBQ Chicken:

4-6 Boneless Skinless Chicken Breasts
40 oz Sweet Baby Ray's BBQ Sauce
1/4 cup Brown Sugar
1/4 cup Vinegar
1/2 tsp Garlic Powder
1/2 tsp Garlic Salt

Place chicken breasts in slow cooker. Whisk remaining ingredients together in a bowl. Pour over chicken breasts. Cook on low for 4 to 6 hours. Enjoy :) The op for this recipe cooked their chicken from frozen. I did the same thing, but I think it would have turned out better if I had cooked from thawed. Also, be sure to let the chicken rest for 5 minutes after cooking to retain moisture. This pic is from the op as well.

Ingredients list for Cheese Balls:

1 pkg String Cheese (I chose the mozzarella variety)
1 can Italian Bread Crumbs
1 cup Skim Milk

Preheat oven to 425 degrees. Cut your string cheese into as many 1 inch pieces as you'd like. Coat with skim milk first, then bread crumbs and place on greased baking sheet. Place in preheated oven until golden brown, or you see the cheese running out of the breading. As I used buttermilk instead of skim milk you may not have that problem. If you visit the link above you'll see that the op just watched the cheese balls until they were ready. Pic from OP

Just found some pictures of the finished products...


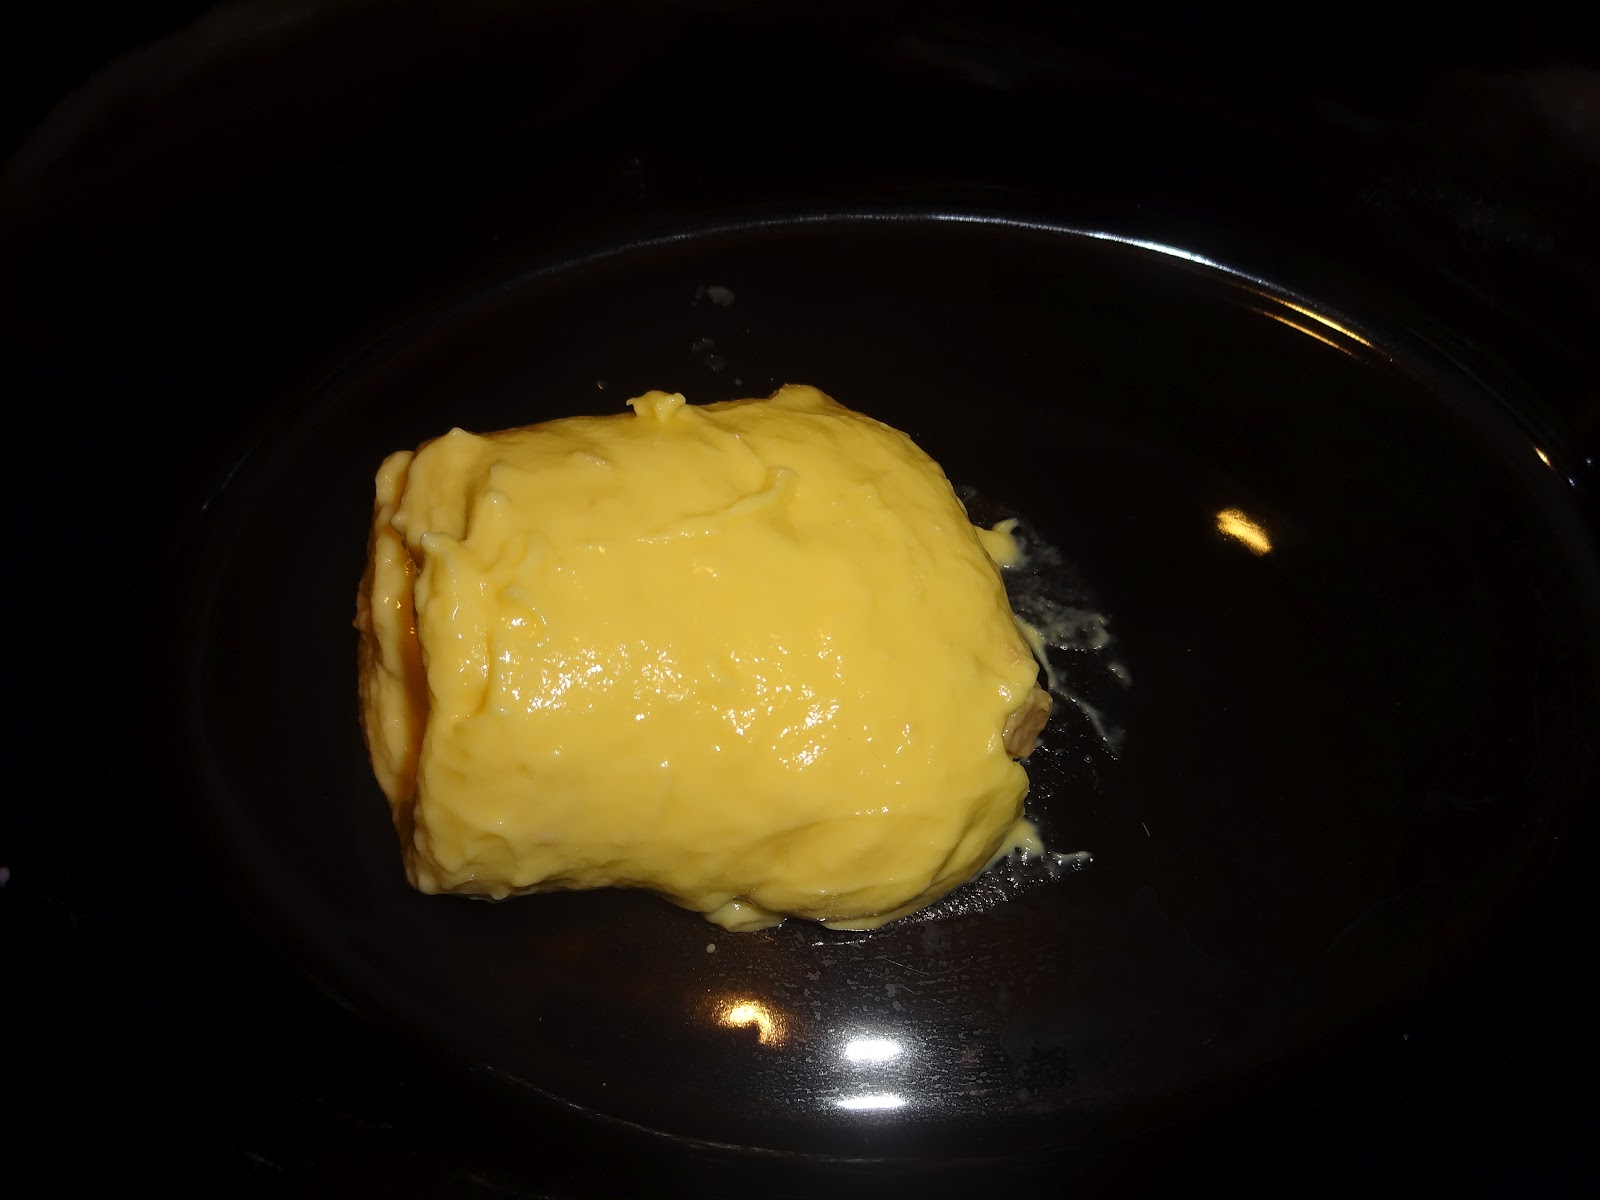
This first picture here, is of me taking out the Sweet Baby Ray's chicken. It turned out pretty good, but would have been better if I had let it sit for a few minutes before serving it.


There, right in front of my perfectly focused, fat belly are the cheese balls. You can almost make out how they oozed out of the breading a little bit. There in the foreground are the garlic, butter green beans we ate with our meal. I, now, feel much better about this blog :)

Wednesday, September 19, 2012

Hawaiian Kings Roll Sandwiches

Sammies! Who doesn't love a great sandwich? Here is a great addition to an already long list of awesome sandwiches out there :) I am calling this Hawaiian Kings Roll Sandwiches for lack of a better name. I saw some similarly made sandwiches out there, but I was first introduced to these by my wife's grandmother.

The list of ingredients:

Hawaiian King Rolls
Ham/Turkey - Really whatever meat you want is fine :)
Swiss Cheese (enough to cover all the sandwiches)
Butter (2 sticks/1 cup)
Worcestershire Sauce (to taste)
Garlic w/Parsley (to taste)
Cavendar's Greek Seasoning (optional and to taste)

 I began by greasing a couple of dishes to bake my King Rolls in. I just used some of the butter, about an eighth of a cup, or 1/4 stick.


Next, I sliced my King Rolls in half making sure to leave the tops and bottoms all connected as you can see above. I'm not sure of the necessity of keeping all the tops together and all the bottoms together aside from having the correct top for the bottom.


I then combined the remaining butter, Worcestershire Sauce, garlic salt, and Cavender's Greek seasoning in an 8" skillet over medium heat.


I let those ingredients simmer for a few minutes.

While my butter sauce was simmering I preheated my oven to 350 degrees and set my timer for 18 minutes. Just as a side note, with the 18 minute time my rolls came out a little crispier than I wanted. I reduced the time to 15 minutes and they came out perfect.


Then I coated the bottoms of the rolls with the butter sauce. I'd say, use about half the sauce here.


Add Swiss cheese. I quartered my cheese and used two quarters per sandwich. I had made these once before and forgot to buy cheese when getting the ingredients. The only thing I had at home was string cheese. I went ahead and used the string cheese, and I thought that had a better taste than this Swiss cheese.


Add ham and turkey...


Put the tops on and coat the tops with the remaining butter sauce, or you could save a bit to put over the tops when they are done, which I did.


Finally, enjoy the finished product. Here are my youngest, Finn and Ember, enjoying a King Roll sandwich. I caught Ember by surprise :)

As always, like, share, Google +1 me, and leave any comments or suggestions below. If you have any ideas or suggestions I'd love to hear them and will give them a try and blog about it later on. Thanks for checking out my blog :)

Friday, August 24, 2012

Chicken & Dumplings...Crock-Pot

Today, I decided we'd have chicken & dumplings...ok, maybe I decided that yesterday, but here I am today committing to my decision. Besides, I have had the chicken for a few days now and really needed to do something with it and get the rest in the freezer to await another great recipe :)

 Here are all my ingredients. I only used four of the chicken breasts, and there are actually two cans of the cream of chicken soup.

 I started by placing my chicken in my Crock-Pot...

 Then, I poured the two cans of cream of chicken soup over then chicken and sprinkled with parsley...

 I love garlic, so I took this opportunity to add some garlic as well. I know what you're thinking...garlic? in chicken and dumplings?! Yes, and I hope it turns out ok :D Oh, and I hope my wife doesn't read this until after supper tonight, lol.

Here, I poured about half of a 32 oz box of chicken broth over the whole thing. I really went with just enough to cover the chicken, maybe a tad more. I used more chicken broth than the original recipe called for because I didn't like the idea of adding water when I had so much broth on hand, lol. Plus, I thought it would taste better.

 Set on low...


Cook for 4 to 6 hours. I like to go right in between with 5 hours, but that's just me. Oh, and after I got everything in and let it go for about half an hour I realized that my Crock-Pot wasn't plugged in...yeah, I know.... Also, my neighbor down the street brought me an onion which I threw in after about an hour of cooking.

As for the biscuits you saw in the picture, after cooking for 4 to 6 hours pull apart chicken. Cut each biscuit dough into 9 pieces. Add the biscuit dough to the Crock-Pot and cook for an additional 30 to 45 minutes.

Hey everyone! I know it has been a couple of weeks since I have updated the blog, but there has been a lot going on. Anyway, here are the pics I promised of the chicken and dumplings :)

 I served my chicken and dumplings with mashed potatoes (the Idahoan boxed variety from Sam's Club) and green beans (also from Sam's Club). The chicken and dumplings turned out great! I only used four chicken breasts and there was plenty of meat for the six of us.

Here is my oldest daughter, Rayven, enjoying a mouthful of her chicken and dumplings :) I think she's got a dumpling there, but I'm not sure.


Future posts to come this week. I recently made some smallish sandwiches which I will be blogging about shortly. That may be my next post. Sorry for my tardiness with this update and thanks for sticking with me throughout :) I will try to be more regular with my future posts. I am aiming for once a week, though I could post at anytime during the week.

Please leave comments and/or suggestions in the comments section of the blog and I will get to them as quickly as possible. Don't forget to Google +1 me, and like and share via Twitter and FaceBook.

Wednesday, August 22, 2012

Crock-pot Ranch Pork

Today I decided to try a recipe that I found on Pinterest. It was linked from Living, Laughing, and Loving. She has some great recipes and her "5 meals in 1 hour" concept is something I will be trying in a future post. I have just started this recipe and it requires 4 to 6 hours in the Crock-pot so I will begin with pictures of the initial preparation and update later tonight with pictures of the finished dish and reactions from my wife and kids.

First, I gathered the three (that's right, I said three) ingredients and put them within easy reach of where I was preparing this meal. The condensed soup also requires a can of water.


I began by putting the Cream of Chicken soup directly in my Crock-pot. I love shaking it out of the can. It reminds me of eating Cream of Mushroom straight out of the can when I was younger.


On top of which, I added the ranch dressing mix. I have never used ranch dressing mix as a seasoning before. I have always been curious to try it and see how it turns out.


To that I added the one can of water required for the condensed soup. The blog Living, Laughing, and Loving mentions that you could use two cans of cream of chicken soup, but I decided to try it this way first.


I started stirring this with a spoon as you can see in the previous picture, but decided a whisk would be a better tool for this step.


I added the pork, submerging it in the mixture of cream of chicken soup and ranch dressing spices. I'm not sure how necessary it was for me to submerge the pork, but it seemed like a good idea to me. I am only using five pieces of pork here.


I set my crock back in its base...


Set my Crock-Pot on low...


...and finally set my time for five hours (5 hours). Now I get to sit back and be tortured by the delicious smells coming from the Crock-Pot for five hours. I will be having some instant mashed potatoes and corn with this.

As promised, here are some pics from supper last night...


Here are the end results! Very scrumptious looking if I do say so myself :) But you don't have to take my word for it...


Here is my daughter, Jade, finishing off her plate. She really enjoyed the instant mashed potatoes I whipped up.

I added some garlic w/parsley to spice it up a bit.

She got her meat down before I could get to my camera :)

She is definitely my pickiest eater, and she gave this meal two thumbs up!

Tonight...nothing special, just spaghetti. Tomorrow I will be trying my hand at chicken and dumplings...I hope that turns out good :)

Italian Herb Tilapia


Before we get started I just want to say that I am in no way a chef :) I like to try new recipes, and attempt to make up my own with whatever we may have in the house at any given time. They don't always turn out great, but sometimes I get lucky. This is one of those occasions where I got lucky :)

Believe it or not, this is from my youngest daughter's plate !
Tonight I decided to take some of the frozen fish we got from Aldi's and see what I could do with it. What you see above is the end result...well, what was left of it :D

The many ingredients...not the crackers though, lol.
First I grabbed my spices and butter. To quote Paula Deen on how much butter I used, "You know it's a good recipe if it starts with a stick of butter." Let me tell you, this recipe is no slouch. I used the spread here, but I know I put in a good stick of butter at least.


While we're talking about measurements, let me tell you how I do things. If it looks good then I go with it, and there can never be enough garlic :) So, on the Italian seasoning, cilantro, and garlic salt w/parsley I'd say go with "to taste".


From here on out things are really easy. I don't like thawing stuff out, so I cooked the Tilapia from frozen. First I preheated my oven to about 375F (no clue how to make the degree symbol). While your oven is preheating place the frozen fish in a glass baking dish, I believe mine is 9 x 13, but I'm not sure. Then I put about an eighth of a stick of butter on each of the four fillet's. Sprinkle liberally with Italian seasoning, cilantro, and garlic salt w/parsley. Bake in oven for 10 minutes. 

My youngest daughter eating her last bite of Italian Herb Tilapia :)
At this point I took the fish out of the oven to turn them. I decided they weren't cooking fast enough or something, lol, and turned up the oven to 400F (if anyone knows how to get that degree symbol throw it in the comments below :D). Once I turned up the heat and turned the fish, I again liberally sprinkled all the seasonings on them after distributing the remaining butter equally (assume one stick of butter half used before turning the other half after). I then placed the fish back in the hotter oven for 12 minutes. Remove from oven and serve. I sided this dish with green beans (drained then nuked in butter for 2 minutes), and baked potatoes (I nuked mine, but I suppose you could put them in with the fish).